
Incident light meters are indispensable tools in photography and cinematography. They measure the light falling onto a subject rather than the light reflected from it, giving far more reliable exposure readings—especially in scenes with dark backgrounds, bright highlights, or high‑contrast lighting.
Commercial incident meters cost anywhere from €200 to €500. That’s a lot for someone who wants to measure indicent light few times a month in own’s YouTube studio. It’s nice, but not that important. That’s why, by the power of soldering and coding, I’ve built one. For roughly $25. And you know what? It works.
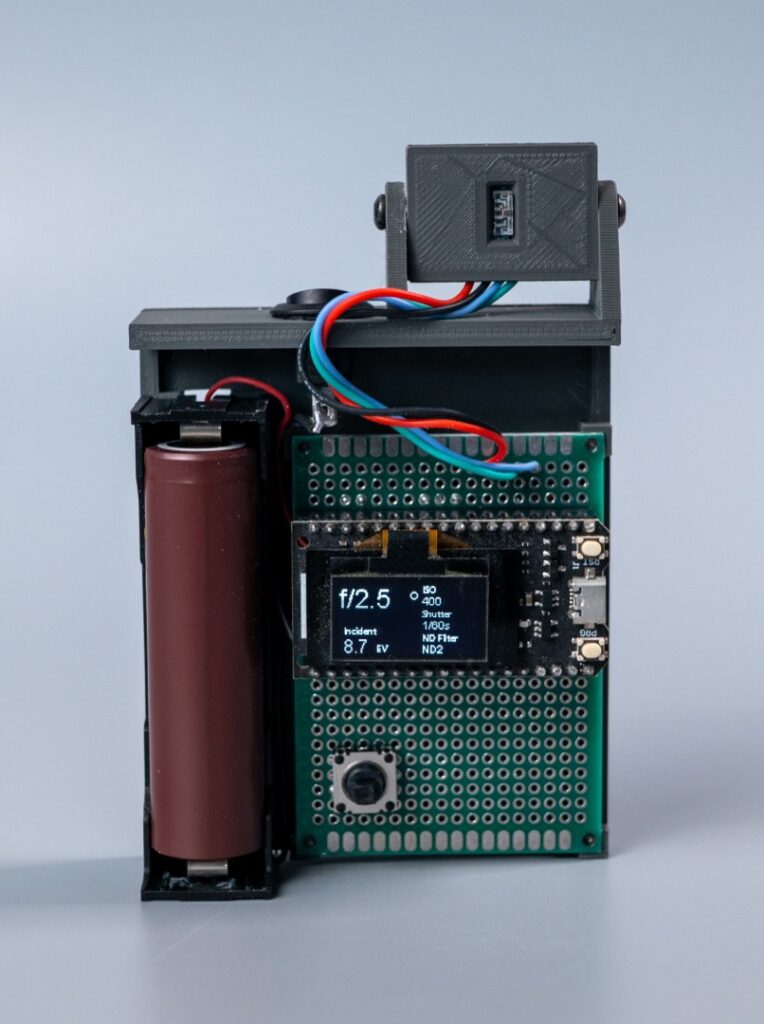
This post walks through the idea behind OpenCineLightMeter, a DIY incident light meter built around:
- ESP32 development board
- VEML7700 digital light sensor
- SSD1306 OLED display
- 5‑way tactile joystick
- 18650 Li‑Ion battery (optional)
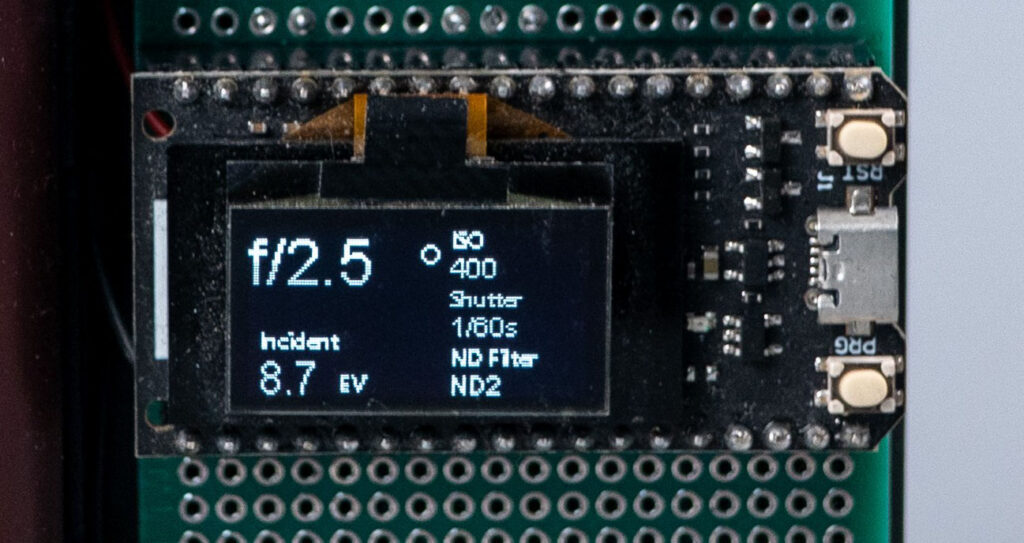
The result is a compact, battery‑powered tool that reads incident light in lux, converts it to exposure values (EV), and computes aperture or shutter speed based on ISO and ND filters—just like a professional cine meter.
Connecting things
The ESP32 is inexpensive, powerful, and perfect for this project:
- Built‑in Li‑Ion charging on many dev boards
- Dual‑core CPU (useful for running the light‑reading task independently)
- I²C support for sensor + display
- Plenty of flash and RAM
- Optionally: Wi‑Fi/Bluetooth for future features
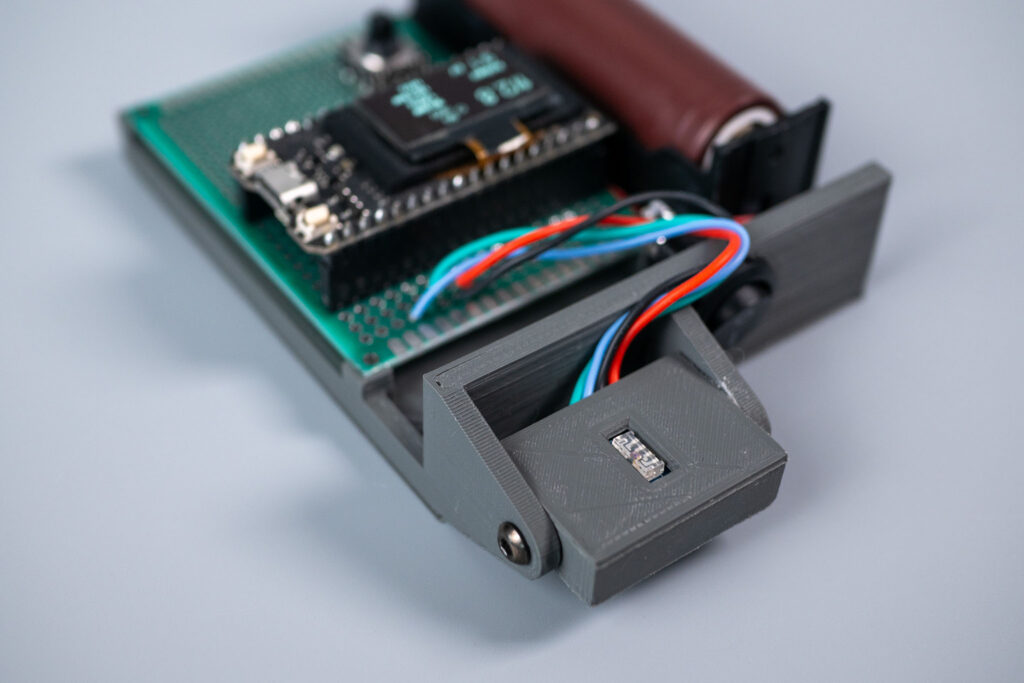
The VEML7700 is a high‑sensitivity ambient light sensor with:
- I²C interface
- Wide dynamic range (0.0036 lux to 120,000 lux)
- Built‑in lux calculation
- No need for ADC calibration
ESP32 ───── I²C Bus ───── SSD1306 OLED
   │
   └──────── I²C Bus ───── VEML7700 Light Sensor

5‑way joystick → GPIO pins
Mode button → GPIO
Hold button → GPIO
18650 battery → ESP32 onboard charger
Both the OLED and VEML7700 share the same I²C bus. The joystick and mode buttons use simple digital GPIO inputs.
Measuring light
#include <Adafruit_VEML7700.h>
Adafruit_VEML7700 veml = Adafruit_VEML7700();lux = veml.readLux(VEML_LUX_AUTO);
reflectedEv = log2(lux) + 3;
incidentEv = log2(lux / 2.5f);
if (settings.type == LIGHT_METER_TYPE_REFLECTED)
{
ev = reflectedEv;
} else {
ev = incidentEv;
}
ev += settings.isoIndex;
ev -= settings.ndFilterIndex;
if (settings.mode == LIGHT_METER_MODE_APERTURE) {
const float shutter = 1.0f / pow(2, settings.shutterIndex);
// Store computed aperture
outputValue = sqrt(shutter * pow(2, ev));
} else if (settings.mode == LIGHT_METER_MODE_SHUTTER){
// Compute shutter time (seconds) from EV and selected aperture
// Equation derivation from aperture mode: f^2 = shutter * 2^ev
// => shutter = f^2 / 2^ev. With full-stop aperture indexing,
// f^2 equals 2^(apertureIndex).
const float apertureSquared = powf(2.0f, settings.apertureIndex);
const float shutter = apertureSquared / powf(2.0f, ev);
// Store computed shutter (seconds)
outputValue = shutter;
}
Converting Lux → EV
Two EV formulas are used:
In case of reflected light mode, it just converts lux to EV with following equation
reflectedEv = log2(lux) + 3;For the incident light mode, code assumes a standard scene reflection of around 18% and uses this formula
incidentEv = log2(lux / 2.5f);The project defaults to incident mode, because reflected mode requires optics the VEML7700 doesn’t have.
How to use it
- Set your camera to Manual mode.
- Match ISO, shutter, and ND filter settings on the meter.
- Point the meter toward the camera (incident metering).
- Read the required aperture or shutter speed.
This avoids the common problem where camera metering gets confused by dark backgrounds or bright highlights.
Limitations
- Side light sensitivity
Without a proper diffusion dome, strong side lighting can skew readings. - Reflected mode disabled
The VEML7700’s wide field of view makes reflected readings unreliable without optics.
Despite these, incident mode performs very well for indoor and controlled lighting setups.
Final Thoughts
This project demonstrates how far inexpensive sensors and microcontrollers have come. With an ESP32, a VEML7700, and a few supporting components, you can build a fully functional incident light meter that rivals commercial tools for a fraction of the cost.
OpenCineLightMeter on GitHub https://github.com/DzikuVx/OpenCineLightMeter
It’s a great weekend build for filmmakers, photographers, and anyone who enjoys hacking together practical tools.


