
Before you start
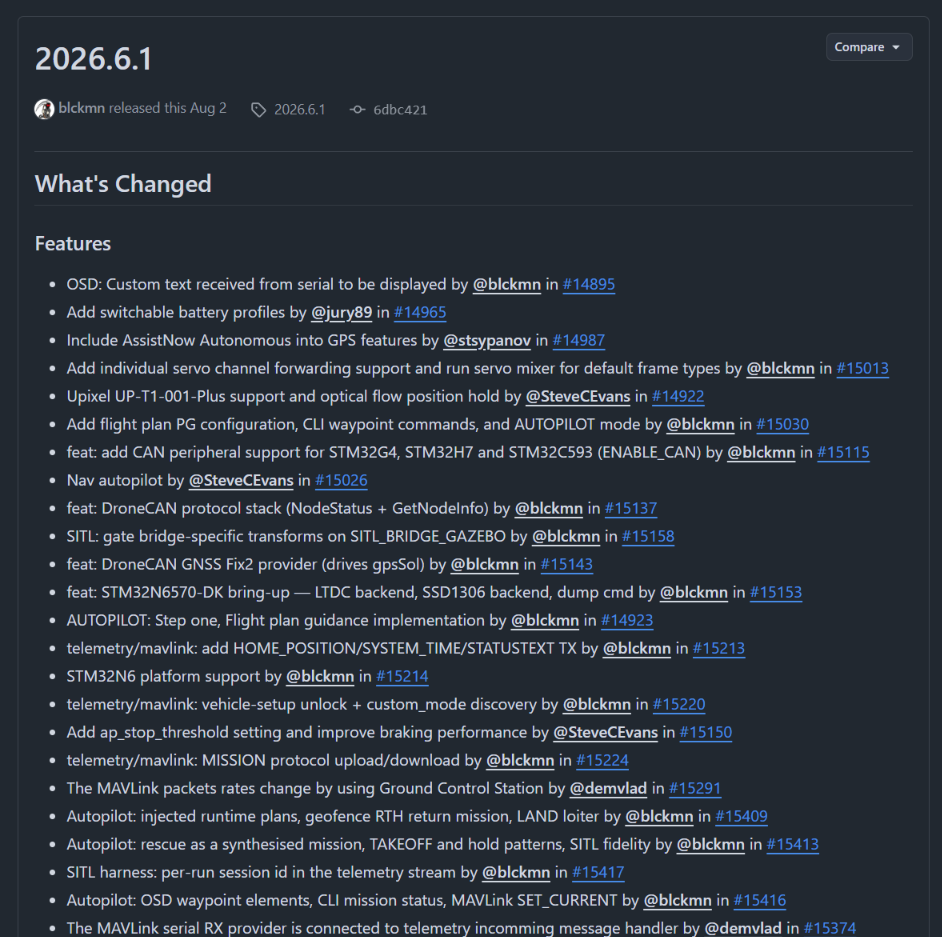
The newest stable Betaflight right now is 2026.6.2, published on GitHub on 16 September 2026. This guide shows you how to put it on your flight controller and do the basic setup so your drone is ready for its first flight.
Betaflight is free, open-source software that runs on the small computer inside your drone, the flight controller. It reads your stick moves and the sensors, then tells each motor how fast to spin. You change its settings with a second program, the Betaflight App.
Two things changed recently, and older tutorials do not show them yet:
- New version names. New releases no longer use numbers like 4.4 and 4.5 (the old 4.5 line only gets small fixes now). Betaflight names each big release after its year and month: first 2025.12, then 2026.6. The team plans two big releases a year, in June and December. The last number (the .2 in 2026.6.2) is a small bug-fix update.
- New app. The old “Betaflight Configurator” is now called the Betaflight App. It runs in your web browser and updates itself, so you always get the newest version. The app and the firmware now share the same version name, so App 2026.6 goes with firmware 2026.6.
This guide is for beginners. Every step has a note in a box like the one below that tells you which screenshot to take for that step.
What you need
You need only a computer, a browser, a good USB cable and your drone. Check this list before you plug anything in:
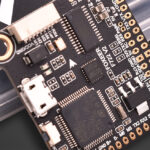
- Your drone or bare flight controller. Find the exact name of the board. It is printed on the board, the box or the shop page (for example SpeedyBee F405 V4). You will need this name when you flash.
- A USB cable that carries data. Many cheap cables only charge a phone and do not carry data. If the computer does not react when you plug in the drone, try another cable first.
- A computer with Chrome or Edge. The Betaflight App needs a browser that can talk to USB devices. Chrome and Edge work best. Firefox works from version 151 on. Safari does not work. Brave can block some features with its strict privacy settings.
- Your radio and a charged battery (for the receiver and motor steps later). On many drones the receiver, video transmitter and motors get power only from the battery, not from USB.
- About 30 minutes of quiet time.
Take the propellers off now. Leave them off until the very end of this guide. During setup the motors can spin without warning, and spinning props can cut you badly.
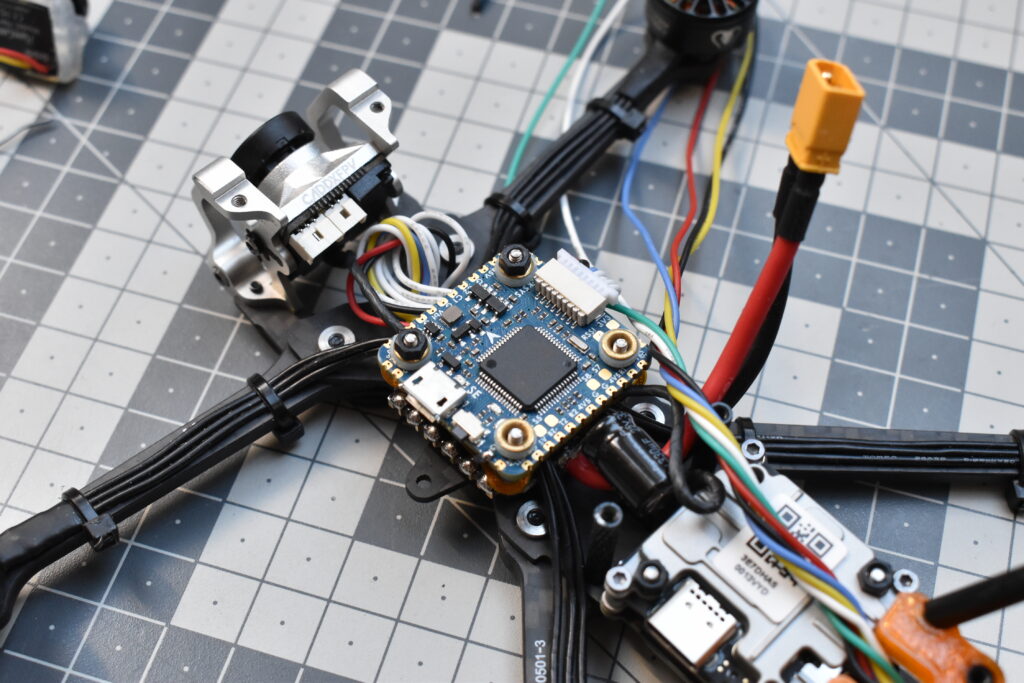
Step 1: Open the Betaflight App
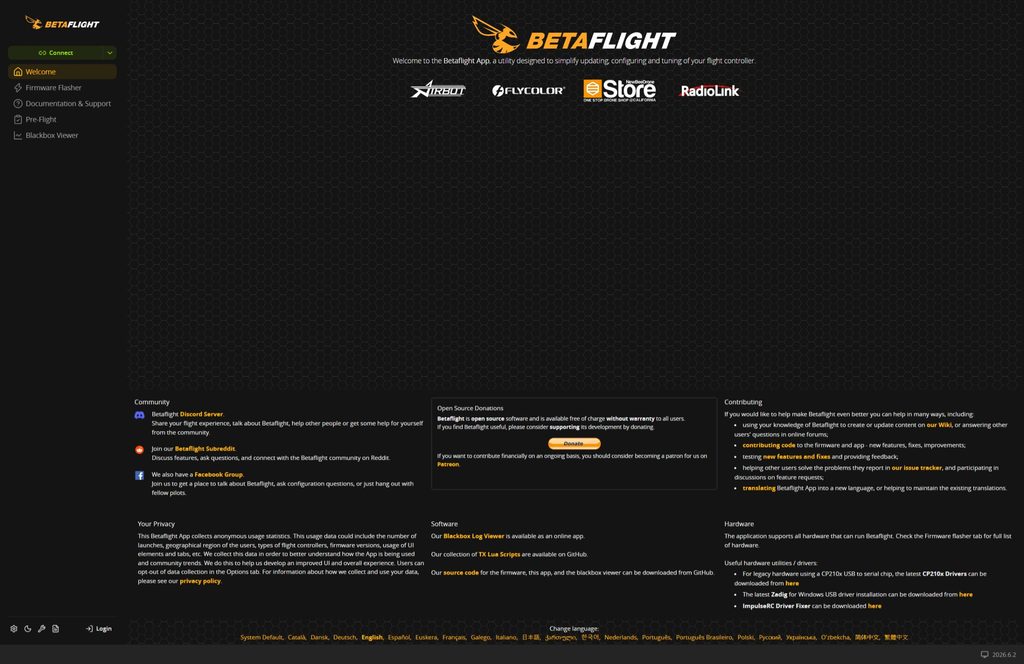
You do not need to download anything. The app lives at app.betaflight.com and always shows the newest version.
- Open Chrome or Edge on your computer.
- Go to app.betaflight.com. You land on the welcome screen with the Betaflight logo.
- (Optional, but handy) Install it as an app. Click the small install icon at the right end of the address bar and confirm. Now Betaflight opens from your Start menu or Dock like a normal program, and it also works without internet.
If you prefer a classic program, installers for Windows, macOS, Linux and Android are on downloads.betaflight.com. iPhone and iPad owners can test an iOS app through TestFlight, but it needs an extra Wi-Fi adapter called Betaflight Bridge, because an iPhone cannot talk to a flight controller over USB. This guide uses the browser on a computer, which is the easiest way for a first setup.
USB drivers
Most of the time the board just works. If the app cannot see your flight controller later, a missing driver is the usual reason. What you need depends on your system:
| System | Normal use (setup) | Flashing mode (DFU) |
|---|---|---|
| Windows | Usually nothing. If the board is not found, run the free ImpulseRC Driver Fixer once. Older boards with a SiLabs chip need the SiLabs CP210x driver. | The WinUSB driver. ImpulseRC Driver Fixer or the free tool Zadig can install it (see Step 3). |
| macOS | Nothing. | Nothing. |
| Linux | Add your user to the dialout and plugdev groups, then log out and back in. | A udev rule for DFU devices. Copy it from the official firmware page. |
On Linux the group command looks like this:
sudo usermod -a -G dialout,plugdev $USERIf your board shows up for a second and then disappears on Linux, the ModemManager service may think it is a phone modem. Stop that service and try again.
Step 2: Connect and save a backup
Always connect and save your old settings before you flash anything. Flashing wipes the board, and a ready-to-fly drone often comes with useful settings from the maker that you will want back later.
Connect for the first time
- Plug the USB cable into the flight controller itself. Do not plug it into a digital video unit or your radio.
- Open the port list. In the 2026.6 app the connection controls sit in the sidebar on the left (older guides show them in the top-right corner). Choose I can’t find my USB device.
- A small browser window pops up with a list of devices. Pick your flight controller (often shown as “STM32 Virtual ComPort” or similar) and click Connect.
- The board now appears in the port list. The browser remembers it, so next time you skip steps 2 and 3.
- Click the big Connect button.
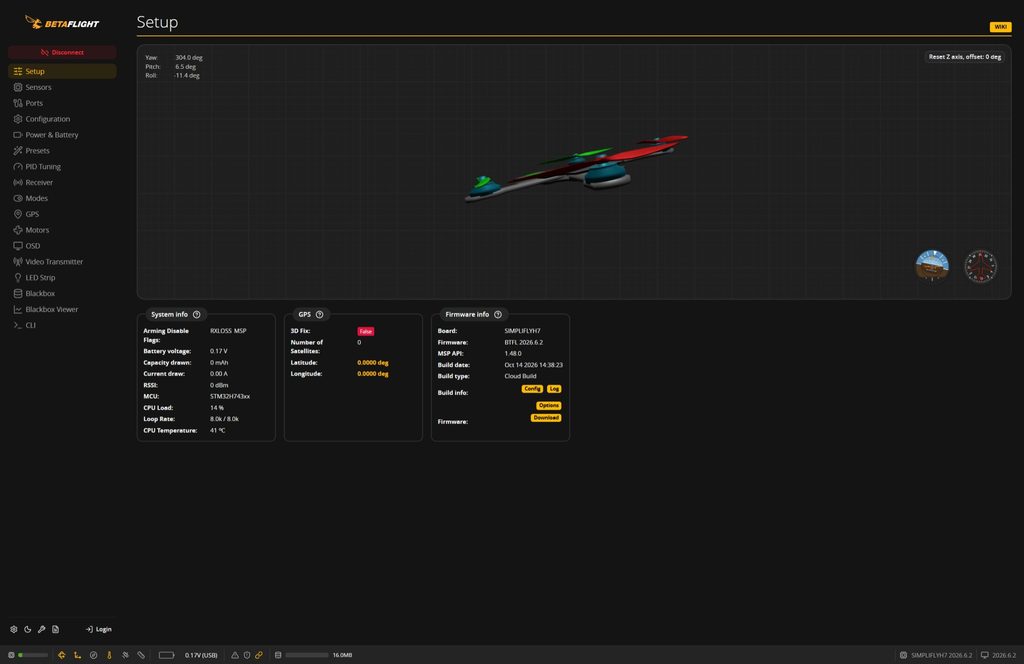
After a few seconds you land on the Setup tab. Tilt the drone in your hand and watch the 3D model on screen. If it moves the same way, the board is alive and talking to the app.
Save your old settings
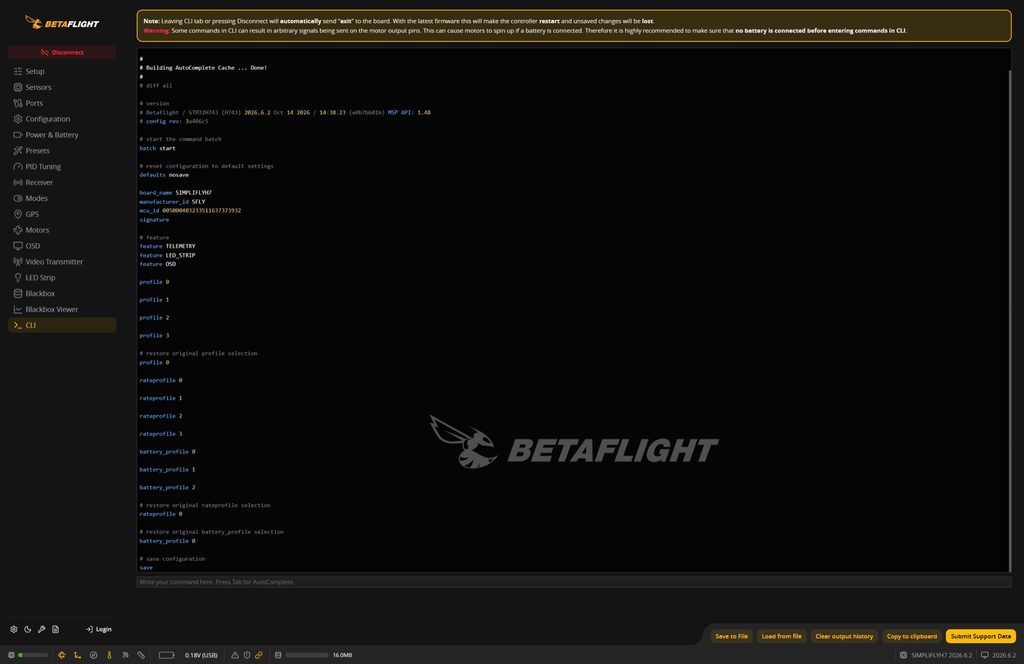
- Click the CLI tab in the left menu. CLI means command line, a text box where you type commands.
- Click into the input line at the bottom, type
diff alland press Enter. - A long list of text appears. These are all the settings that differ from the factory defaults.
- Click Save to File and keep the file somewhere safe, for example in a folder named after the drone.
- Look near the top of the text for a line that starts with
board_name. The word after it is the exact name of your board in Betaflight. Write it down for the next step.
Screenshot 6: The CLI tab after running
diff all. Show the first lines of the output with theboard_nameline clearly visible, and put a red box around the Save to File button.
Do you need to update at all? If your drone already flies well on an older version, there is no rush. Update when you want a new feature, when the maker tells you to, or when you build a new drone. If your board uses a small chip such as the F411, it has less memory, so in Step 3 you will tick only the features you really use.
Step 3: Flash Betaflight 2026.6
Flashing builds a custom firmware on Betaflight’s servers, downloads it and writes it to your board in about one to two minutes. It erases every setting on the board, which is why you saved a backup in Step 2.
The flasher in the 2026.6 app has two parts: Board & Build, where you pick the board and features, and Flash, where the writing happens.
Pick the board and version
- Click Firmware Flasher in the sidebar. If you do not see it, click Disconnect first.
- Click Auto-detect. The app reads your board and fills in its name. Check that it matches the
board_nameyou wrote down. If detection fails, pick the name by hand from the list. - Look at the small status label next to the board. Betaflight Supported means the Betaflight team checked the board. Manufacturer supported means the maker looks after it. Legacy means nobody maintains it any more, so use it at your own risk.
- In the version list, pick the newest 2026.6.x release. Leave Expert Mode and “Show release candidates” switched off. Those show test versions that can still have bugs.
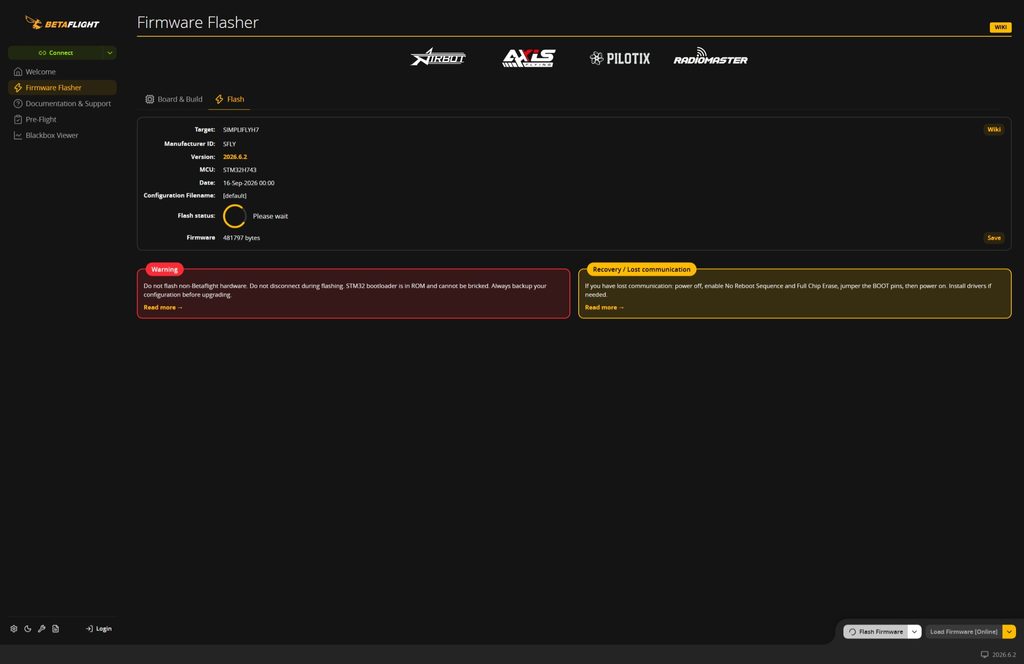
Choose the build options
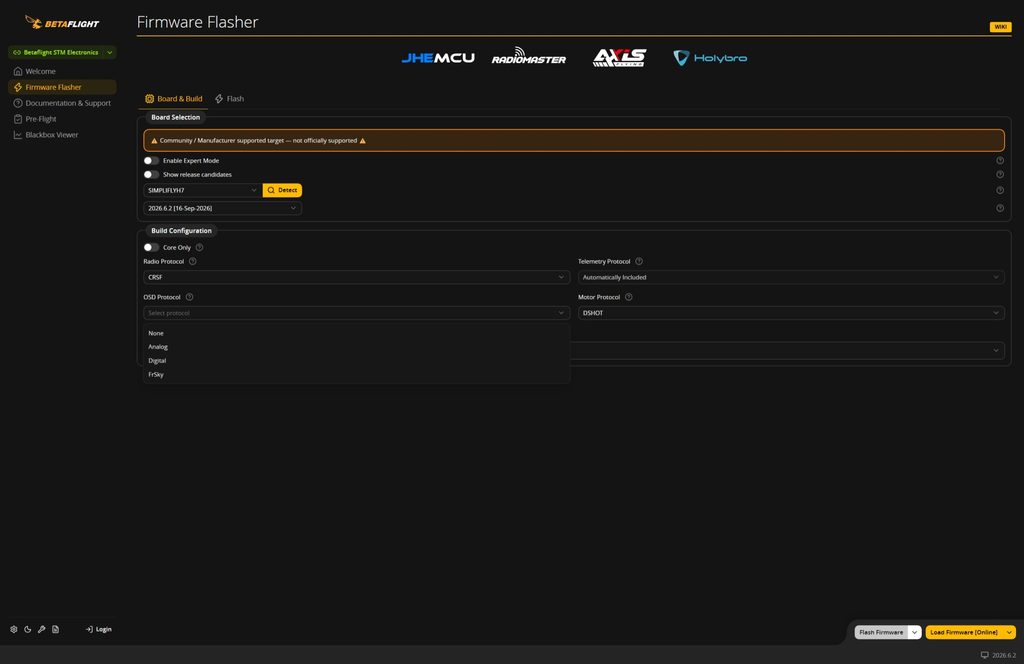
Betaflight builds the firmware only with the parts you tick. That keeps it small, which matters on boards with little memory, such as F411 and some F722 boards. You cannot add a missing part later without flashing again, so take a minute here.
| Setting | What to pick |
|---|---|
| Radio protocol | CRSF for ExpressLRS or TBS Crossfire, SBUS for FrSky or DJI radios, IBUS or SBUS for FlySky, GHST for ImmersionRC Ghost |
| Telemetry | Leave the default. For CRSF, GHST and FPort it is added on its own. |
| OSD | OSD (SD) for analog video, OSD (HD) for DJI, Walksnail or HDZero |
| Motor protocol | DSHOT (only change it for brushed motors or very old ESCs) |
| Other options | Tick only what your drone has: VTX for analog video control, GPS if you have one, LED Strip for LEDs, Magnetometer for a compass |
Is your ExpressLRS receiver built into the flight controller (an SPI receiver)? Then its main version must match your radio module. The 2026.6 firmware uses ELRS version 3 by default. For ELRS version 4 you add the ELRSV4 build flag in the flasher.
Leave Core Only switched off. It builds a firmware with almost no features and is only meant for hardware testing.
Write the firmware
- Leave the advanced options alone. With Expert Mode off you do not even see them, and the defaults are the safe choice: Full Chip Erase on, No Reboot Sequence and Flash on Connect off.
- Click Load Firmware [Online]. A progress ring shows while the server builds your file. This can take a minute.
- Go to the Flash part and click Flash Firmware.
- The app offers to save your current settings first. Say yes. A second backup never hurts.
- Wait. The bar goes through erase, write and check. Do not unplug the cable during this time.
- When it says the flash was successful, the board restarts on its own.
The 2026.6 app can put your old backup back on the board right after flashing. This is fine for a small update, for example 2026.6.1 to 2026.6.2. When you jump a big version, for example from 4.5 to 2026.6, do the setup by hand with Steps 4 to 8. Old settings can clash with the new firmware. You can still copy small, simple parts from your old backup, like the modes or the VTX table.
If flashing fails: DFU mode
If the board does not restart into flashing mode on its own, force it into DFU mode (bootloader mode):
- Hold the small BOOT button on the flight controller while you plug in the USB cable. Then let go.
- Or, while connected, type
blin the CLI tab and press Enter.
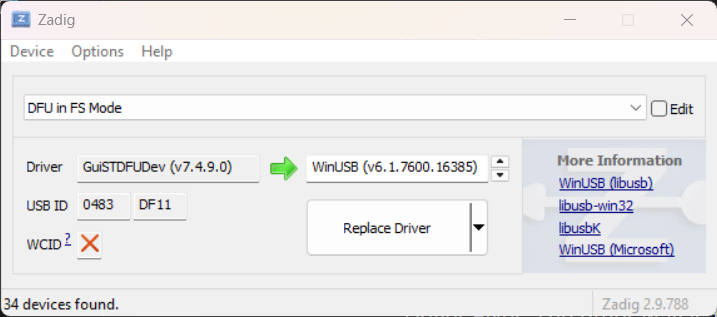
In DFU mode the board shows up as “DFU” instead of a normal port. Switch on Expert Mode, turn on No Reboot Sequence and flash again. On Windows, DFU mode needs the WinUSB driver. The easiest fix is to run ImpulseRC Driver Fixer. The other way is the free tool Zadig: choose Options, then List All Devices, select STM32 BOOTLOADER, pick WinUSB and click Install Driver.
Step 4: First connection after flashing
After the flash your board runs Betaflight 2026.6 with factory settings. Connect again and fix the first two warnings. The other settings follow in the next steps.
One rule for the rest of this guide: after you change something on a tab, click Save (or Save and Reboot) before you switch tabs. If you leave the tab first, your changes are lost.
Turn on Expert Mode
Open the Options tab and switch on Expert Mode. Some tabs, such as Failsafe, stay hidden without it. While you are there, you can also pick a colour theme and your language.
Calibrate the accelerometer
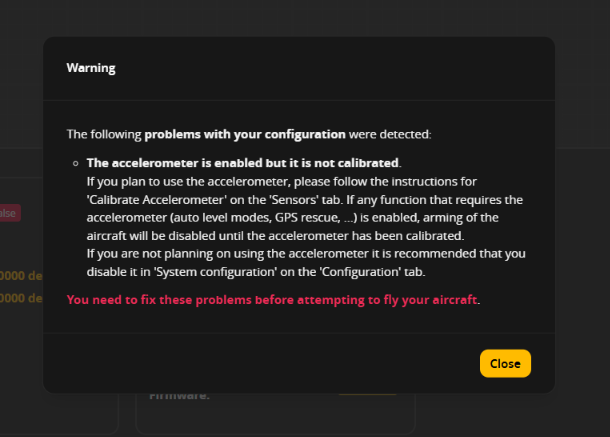
Right after connecting you will probably see a warning that the accelerometer is not calibrated. The accelerometer is the sensor that tells the drone which way is down.
- Put the drone on a flat, level table. If a cable sticks out underneath, hold the drone as level and still as you can.
- On the Setup tab, click Calibrate Accelerometer.
- Do not touch the drone for a few seconds until the app says it is done.
The second warning says that no motor protocol is selected. You fix that in Step 6.
Check the board orientation
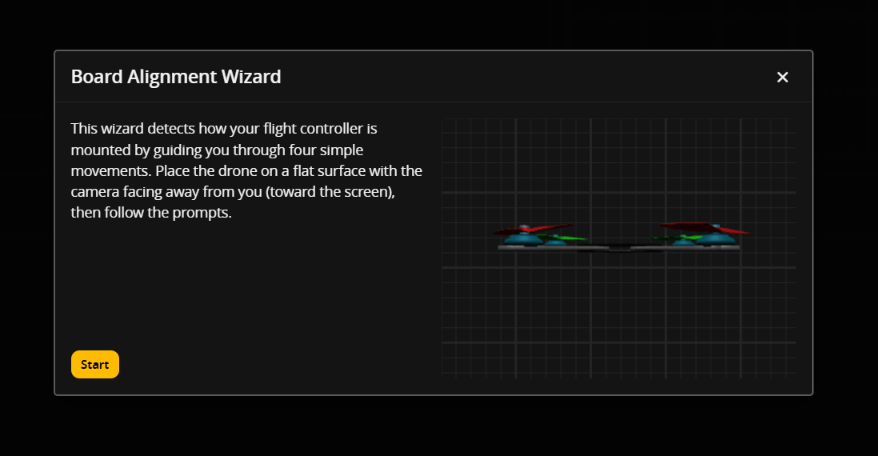
Hold the drone with the camera pointing away from you and click Reset Z axis on the Setup tab. Now tilt the drone forward, back and to the sides. The 3D model must copy every move.
If the model moves the wrong way, the flight controller is mounted turned or upside down. Never fly like this. Fix it in one of two ways:
- Use the new Board Alignment Wizard on the Sensors tab. It guides you step by step and works out the correct angle from the sensors.
- Or set the yaw angle of the board alignment by hand (90, 180 or 270 degrees) until the model matches.
Give your drone a name
On the Configuration tab, type a short Craft name. It shows up in your goggles and in the file names of your backups, which helps when you own more than one drone. Click Save and Reboot.
Step 5: Ports and receiver
The flight controller must know where your receiver and video system are wired. You set this on the Ports tab, then you set the receiver type on the Receiver tab.
Bought a ready-to-fly (BNF) drone and did not flash? Then the Ports tab is most likely set up already. Check it, but do not change it without a reason.
Ports tab
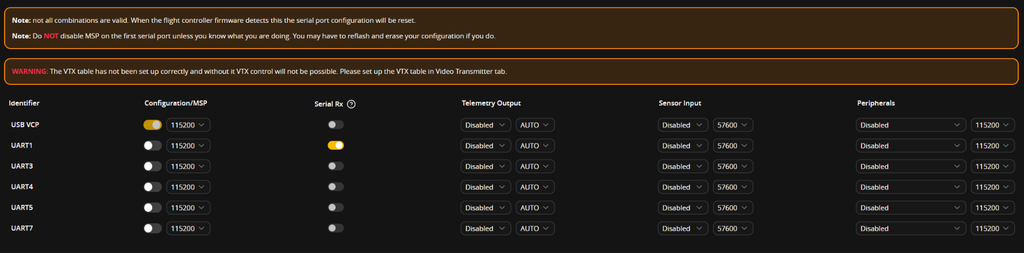
Your flight controller has several serial ports called UARTs. Each one has a pair of pads with the same number, for example RX2 and TX2 for UART2. Look at your board or its manual to see which pads your receiver is soldered to.
- Find the row of that UART and switch on Serial RX. Only one UART can have Serial RX turned on.
- Do not turn on MSP on the same UART. Betaflight refuses to save that combination.
- Using DJI, Walksnail or HDZero digital video? On the UART of your video unit, set the peripheral to VTX (MSP + DisplayPort). MSP turns on by itself.
- Using analog video with a SmartAudio or Tramp wire? Set the peripheral on that UART to VTX (TBS SmartAudio) or VTX (IRC Tramp).
- Click Save and Reboot.
Is your receiver built into the flight controller (an SPI receiver)? Then you skip the Ports tab and go straight to the Receiver tab.
Receiver tab
Pick the receiver mode and the protocol that matches your radio system:
| Radio system | Receiver mode | Provider |
|---|---|---|
| ExpressLRS or TBS Crossfire (separate receiver) | Serial (via UART) | CRSF |
| ExpressLRS built into the flight controller | SPI Rx (built-in) | EXPRESSLRS |
| FrSky | Serial (via UART) | SBUS or FPort |
| Spektrum | Serial (via UART) | Spektrum 1024/2048 or SRXL2 |
| FlySky | Serial (via UART) | IBUS |
Click Save. Plug in the battery (props are still off), switch on your radio and bind the receiver to it the way your receiver’s manual describes.
Now move the sticks. The bars on screen must follow:
- Wrong bar moves? For example, the roll bar moves when you push throttle. Then change the Channel Map. Most radios use AETR1234 or TAER1234.
- Sticks in the middle should show about 1500.
- Sticks at the ends should show about 1000 and 2000. Small differences such as 988 or 2012 are fine.
If the bars turn a warning colour and a banner appears, the flight controller is in failsafe. It means no signal is coming in, not that the receiver is broken. Check the binding and the wiring.
Step 6: Motors
The flight controller needs to know how to talk to the ESCs (the speed controllers of the motors). Then you test that each motor sits in the right place and spins the right way. Check again that all propellers are off.
Pick the motor protocol
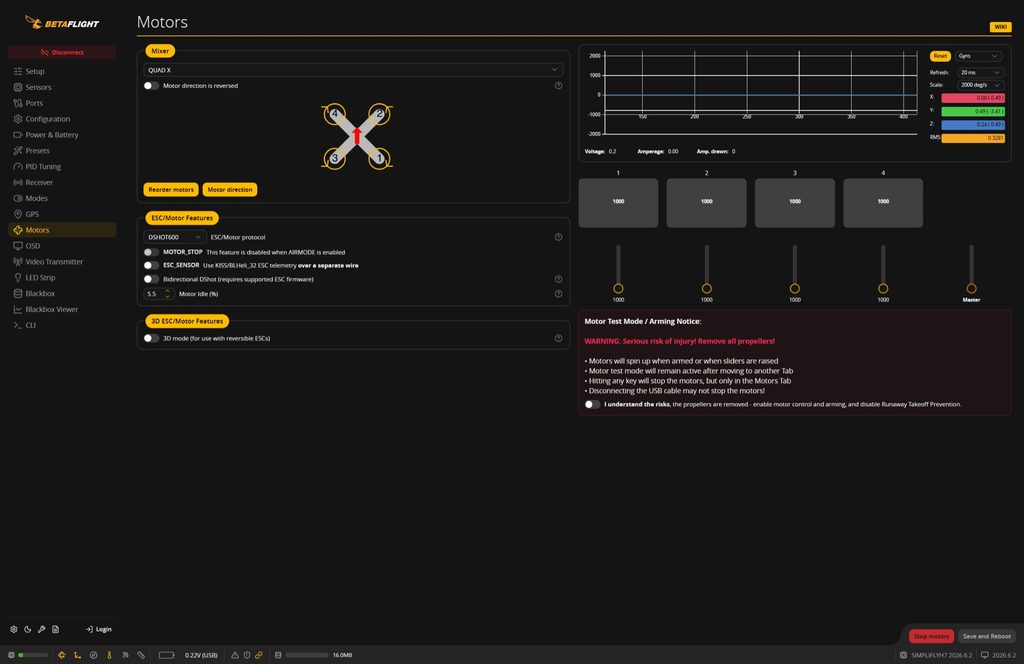
- Open the Motors tab.
- Under ESC/Motor protocol, pick DShot300 or DShot600. Any modern ESC uses DShot.
- DShot300 suits slower boards (F411) and boards with the BMI270 gyro, or a 4 kHz loop.
- DShot600 suits fast boards (F7, H7) that run an 8 kHz loop.
- Not sure? DShot300 always works. A faster setting than your board needs does no harm, it just brings no benefit.
- Click Save and Reboot. This also clears the “no motor protocol” warning from Step 4.
Test the motors
- Plug in the battery. Props stay off.
- Go back to the Motors tab and tick the box that says you understand the risk and removed the props.
- Raise one motor slider a little at a time. Each motor should spin smoothly. A small stutter at the very bottom is normal.
- Check that the right motor spins. Betaflight expects this order by default, seen from above with the camera at the front:
| Motor | Position | Spins |
|---|---|---|
| 1 | Rear right | Clockwise |
| 2 | Front right | Counter-clockwise |
| 3 | Rear left | Counter-clockwise |
| 4 | Front left | Clockwise |
This default layout is called props in. If you set the switch Motor direction is reversed, every motor spins the other way. That layout is called props out, and some freestyle pilots prefer it.
- A different motor spins than expected? Click Reorder Motors and follow the steps on screen. The app spins one motor at a time and you click where that motor sits on the picture.
- A motor spins the wrong way? Click Motor Direction and flip only that motor. No soldering needed.
Pull the sliders back to zero and unplug the battery when you are done.
Step 7: Modes and the arm switch
The only mode you really must set is ARM. Arming wakes the motors up. Without an arm switch the drone will never fly. All other modes are extras you put on switches of your radio.
First make sure your radio sends the switches as extra channels (channel 5 and up, also called AUX1, AUX2 and so on). How you do this depends on your radio. Most ready-made ELRS radios already send them.
Set up the arm switch
- Open the Modes tab and find ARM.
- Click Add Range. A slider appears with a channel box set to AUTO.
- Flip the switch you want to use for arming. The app sees it and picks the right channel.
- Flip the switch to the armed position. A small yellow marker shows where the switch is now. Drag the ends of the slider so the marker sits inside the range.
- Flip the switch back. The marker must now be outside the range.
- Click Save.
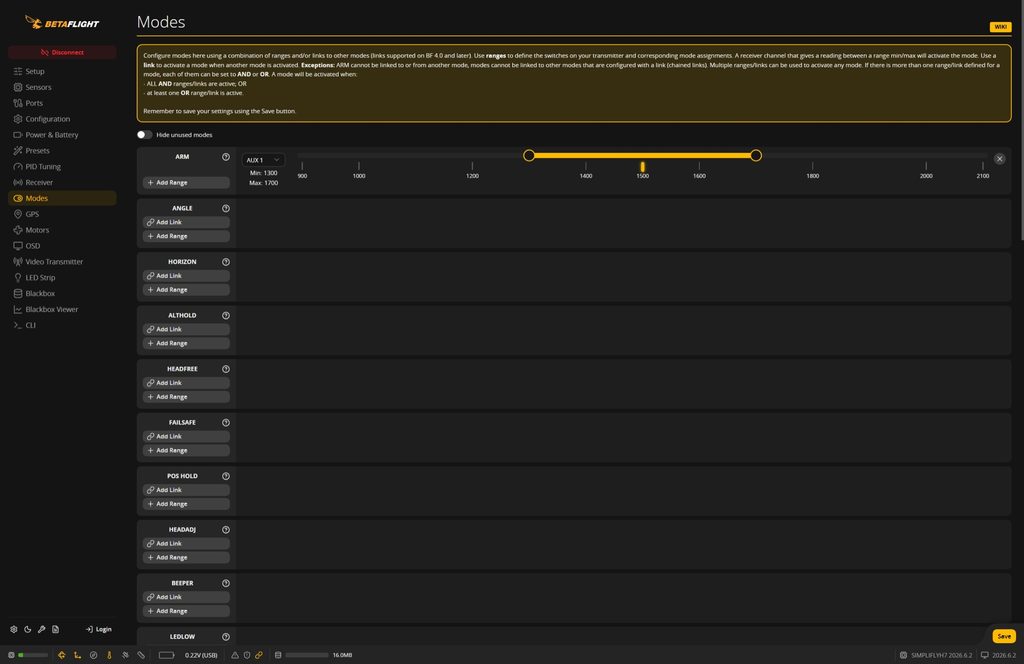
Do not worry if the drone does not actually arm while the app is connected. Betaflight blocks arming as long as it is talking to the app, which is a safety feature.
Useful extra modes
- ANGLE keeps the drone level when you let go of the sticks. Great for your first flights. Without any mode switched on, the drone flies in Acro mode, where it holds whatever tilt you give it. You do not need to set up Acro, it is simply what is left when no other mode is on.
- BEEPER makes the drone beep so you can find it in tall grass.
- FLIP OVER AFTER CRASH (also called turtle mode) spins the motors backwards to flip the drone over after it lands upside down. Use it with care, because it puts a lot of strain on motors and ESCs when a prop is blocked.
Step 8: Failsafe, OSD and final checks
Three more things before the first flight: tell the drone what to do when it loses signal, set up the text in your goggles and test everything on the bench.
Failsafe
Failsafe decides what the drone does when the radio signal is lost. It is the most important safety setting in Betaflight.
- Open the Failsafe tab (you turned on Expert Mode in Step 4, so it is visible).
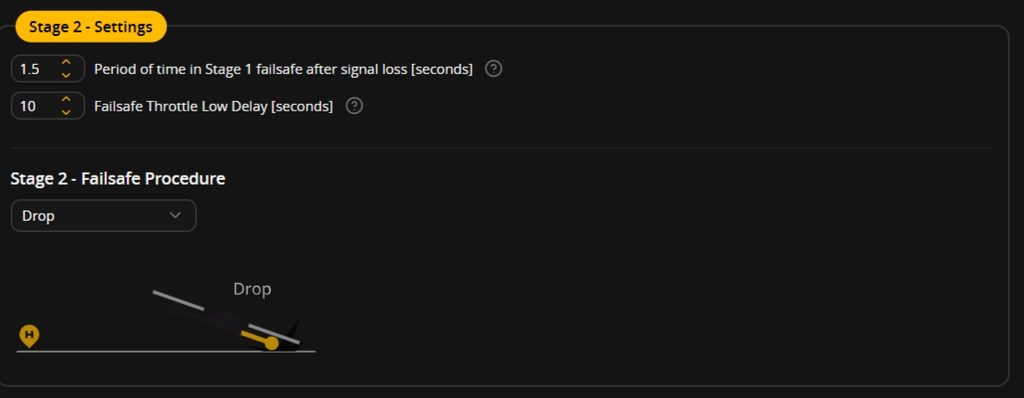
- Without GPS: set the stage 2 procedure to Drop. The drone waits a moment for the signal to come back, then turns off the motors and falls. That sounds harsh, but it is much safer than a drone that flies away.
- With GPS: you can choose GPS Rescue, so the drone flies back home by itself. GPS Rescue was rebuilt in 2026.6 and needs its own setup. If you have a compass, only switch on
trust_magafter you checked that the compass is calibrated and points the right way. - Click Save and Reboot.
Battery voltage
Plug in a battery and compare the voltage at the top of the app with a battery checker or multimeter. If the numbers differ, open the Power & Battery tab, click Calibration, type in the real voltage and apply it.
OSD (text in your goggles)
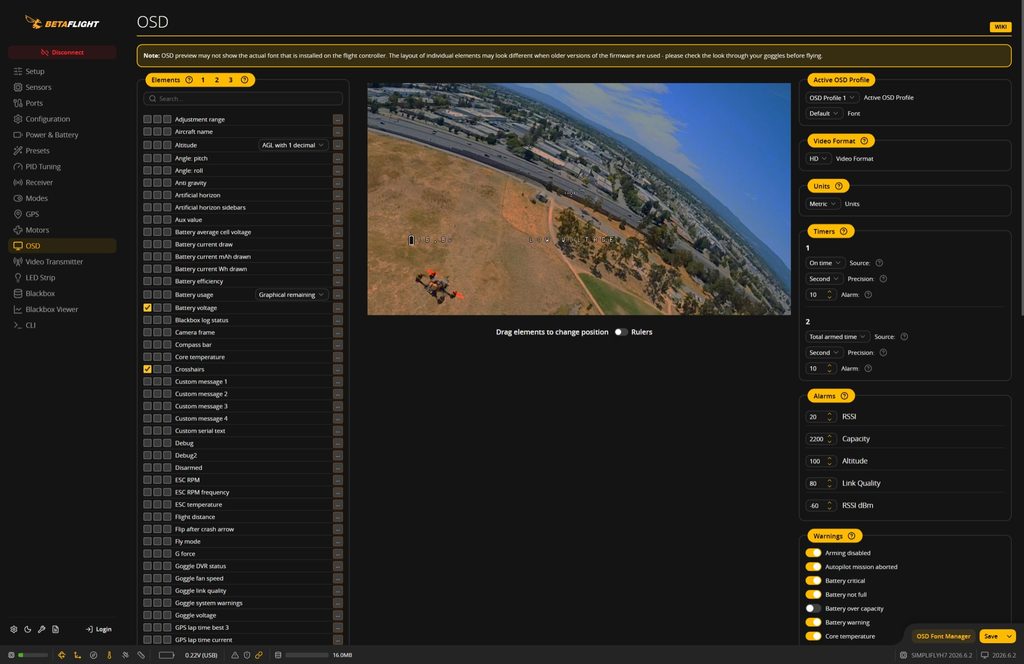
- Open the OSD tab.
- Set the video format: HD for DJI, Walksnail or HDZero, and Auto (or PAL or NTSC) for analog.
- Tick at least these elements: Warnings, Battery average cell voltage and Link quality (or the RSSI value your radio supports).
- Drag the elements in the preview to where you want them and click Save.
Using DJI or Walksnail? The Presets tab has ready-made OSD presets for these systems. Search for your system and apply one to save time.
Final bench checks (props still off)
Unplug the USB cable for the arming tests, because the drone cannot arm while it is connected to the app.
- Failsafe test: battery in, radio on, arm. The motors spin slowly. Now switch off the radio. The motors must stop within a couple of seconds.
- Stick check: on the Receiver tab, roll, pitch, yaw and throttle each move the right bar in the right direction.
- Leveling check: arm, give about 30 percent throttle and tilt the drone by hand. The motors on the lower side should speed up to push it back.
- Fresh backup: run
diff allin the CLI tab again and save the file. This is your clean 2026.6 setup. - Props on: fit each propeller so it matches the spin direction of its motor and tighten the nuts.
If any check fails, do not fly. Go back to the step that covers it. When everything passes, do your first short hover in an open place, far from people.
Troubleshooting
Most problems come from a cable, a driver or one wrong setting. Find your problem in the left column.
| Problem | Usual cause | What to do |
|---|---|---|
| The board does not show up in the port list | Charge-only cable, cable in the video unit instead of the flight controller, missing driver, or another program holds the port | Try another cable, plug into the flight controller, run ImpulseRC Driver Fixer, close other programs (3D printer software is a common one) |
| The app connects, but flashing fails | The flashing (DFU) driver is missing on Windows | Run ImpulseRC Driver Fixer or install WinUSB with Zadig, then flash in DFU mode (Step 3) |
| Settings jump back to the old values after saving | Two settings clash, such as MSP and Serial RX on the same UART | Turn one of them off and save again |
| A sensor or feature is missing after flashing | Wrong board picked, or the feature was not ticked in the build options | Flash again with the right board and options |
| Stick bars do not move | Receiver not bound, TX and RX wires not crossed, wrong UART or wrong provider | Bind again, wire TX to RX and RX to TX, check the Ports and Receiver tabs |
| Sticks work, switches do not | Your radio does not send the extra channels | Assign the switches to channels 5 and up in your radio’s mixer |
| The drone will not arm | A safety check is blocking it | Type status in the CLI to see why (see below) |
| The drone flips over right at take-off | Props on the wrong motors, wrong spin direction, wrong motor order or wrong board alignment | Repeat the checks in Step 4 and Step 6 |
| Motors speed up on their own on the bench | Normal with props off. The drone tries to correct a tilt it can never fix | Nothing to fix. It goes away with props on |
| No OSD in analog goggles | Camera wired straight to the video transmitter, or OSD not ticked in the build | The camera signal must pass through the flight controller. Reflash with OSD (SD) |
The most common reasons the status command shows for a drone that will not arm:
- THROTTLE: the throttle stick is not all the way down.
- ANGLE: the drone is tilted more than the allowed arming angle. Put it on level ground.
- CALIB: the sensors are still calibrating. Wait a few seconds after plugging in.
- RPMFILTER: bidirectional DShot is on, but the ESCs do not send speed data back. Turn it off or update the ESC firmware.
- MSP or CLI: the drone is connected to the app. This is normal on the bench.
Two upgrade traps from the 2026.6 release notes. Boards with the IIM-42652 gyro had a wrong sensor range before. After the update your old PID values act twice as strong, so reset and tune the PIDs again and never fly the old tune. And if you jump from 4.5 straight to 2026.6 and your IST8310 compass is no longer found, its default address changed. Set it back in the CLI with set mag_i2c_address = 12, then save.
Sources and further reading
This guide is based mainly on the official Betaflight GitHub repository and the official docs, checked against two popular community tutorials.
Betaflight on GitHub
- Betaflight firmware repository (README with links to the app and docs)
- Betaflight releases (2026.6.2 marked as latest, 16 September 2026)
Official Betaflight docs and blog