In this article we will concentrate on Microceph implementation of the Ceph storage platform
My cluster is built with four Raspberry Pi 5 16GB. Each is equipped with:
- PCIe connected 128GB NVMe via M.2 HAT+
- USB connected 128GB NVMe via USB-to-M.2 adapter
- Ubuntu Server 24.10
- Microceph
- MicroK8s
Adding a new node to the Microceph cluster is a relatively simple task I already described in a separate article. But, there are a few extra steps that you can take to just make it better.
Drives and OSD
Ceph OSD (Object Storage Daemon) is a core component of the Ceph distributed storage system. It is responsible for storing data, handling replication, recovery, and rebalancing within the cluster. Each OSD runs on a storage device and communicates with other OSDs to ensure data redundancy and fault tolerance.
When you add a new host to the Microceph/Ceph cluster, you have two options to add OSD: whole drive and a loop file.
Loop file
The simpler and less intrusive way of assigning disk space to the Ceph cluster is to use a loop file. It’s just a file that resides on existing file system. To add a loop based OSD run the following command
sudo microceph disk add loop,80G,1It will create a single 80GB OSD and assign it to the cluster. Of course, adjust OSD size so it will fit on your root file system
whole drive
The more professional way of doing things is to assign the whole drive as an OSD.
Bear in mind, it will use the whole drive. If a drive is assigned as an OSD, it will not be possible to use it for anything else
sudo microceph disk add /dev/sdbThe command above assigns the whole sdb as Microceph OSD. OSD size will of course depend on the drive size. You don’t have to mount it, or setup partitions. Ceph will handle everything. Of coutse, it’s a good idea to remove existing partitions before with
sudo wipefs -a /dev/sdbverification
You can verify new OSD was added and configured by running
sudo microceph disk list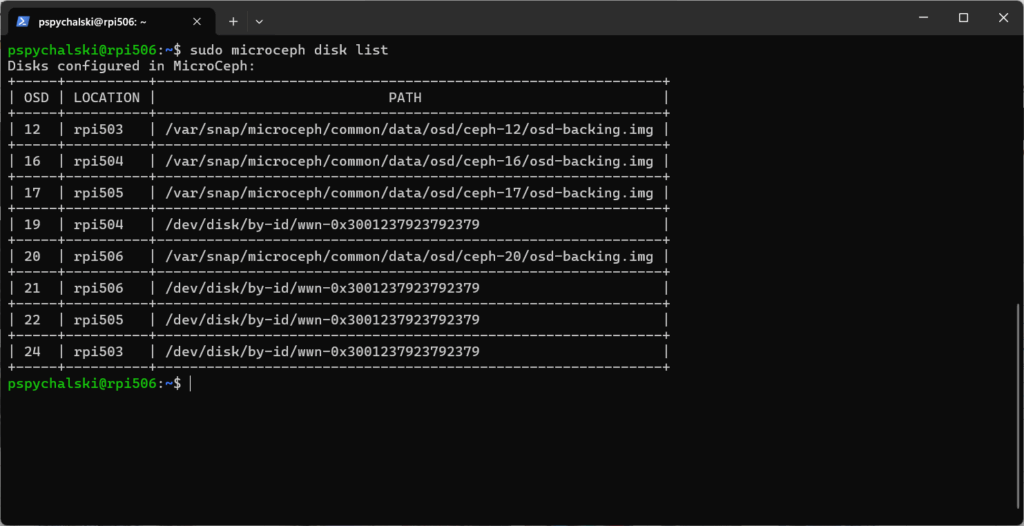
and
sudo microceph.ceph status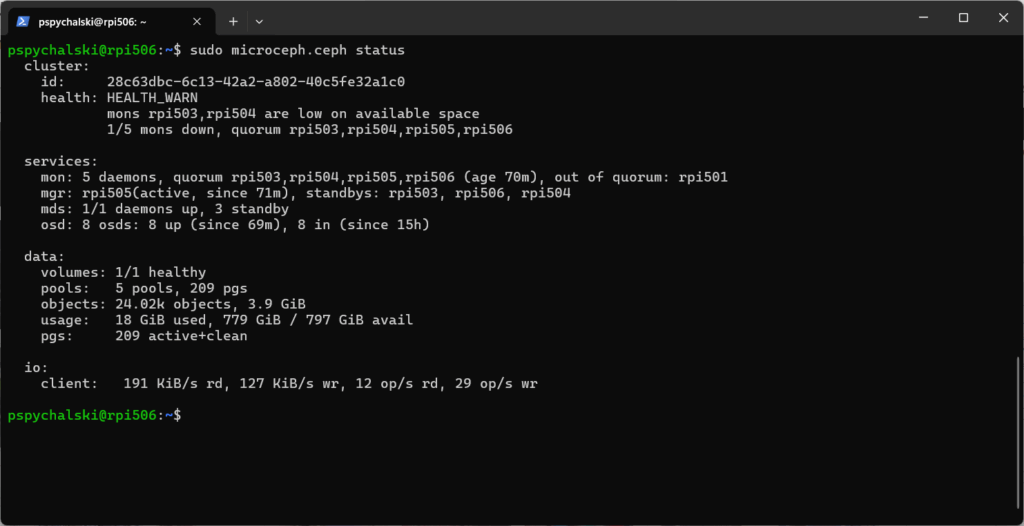
https://canonical-microceph.readthedocs-hosted.com/en/squid-stable/how-to/enable-service-instances
Services
Once Microceph will reach minimum host availability, it will stop enabling Monitor (MON), Manager (MGR) and Metadata (MDS) services on newly added nodes. For example, if you add 4th host, Microceph will not run MON, MGR and MDS on it. Only OSD service. This can be changed by manually starting them on new nodes.
If we want to enable services on node rpi506, commands would look like this
sudo microceph enable mon --target rpi506
sudo microceph enable mgr --target rpi506
sudo microceph enable mds --target rpi506
Kernel module
The fact that your host runs microceph, it does not mean your other services running on this host can access it. And this is quite required if your hosts runs both Microceph and Kubernetes.
You will have to install ceph-common and ensure kernel module is loaded on startup
sudo apt update
sudo apt install ceph-common
modprobe ceph
And then
sudo nano /etc/modules-load.d/ceph.confPut ceph into the file, save and exit.
You can always check if ceph kernel module is loaded by running
lsmod | grep ceph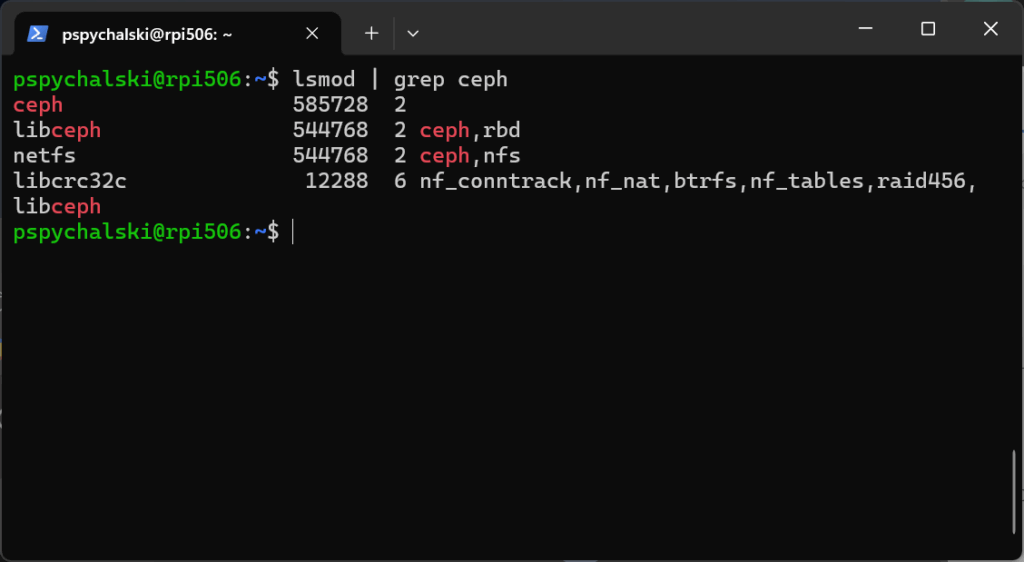

")


